
Telemedicine Instructions Using an Android
This page has step-by-step instructions to join your telemedicine appointment using your Android phone.
You can join your telemedicine visit through the MyChart app or your MyChart account in a web browser by clicking the link in your appointment confirmation email.
Before your appointment, you’ll check in using the MyChart app. You can check in up to a week before your appointment.
TIP: We recommend checking in the day before your appointment.
You can join the visit up to 20 minutes in advance. You have a 15 minute grace period to join. If you haven’t joined by the end of the grace period, you will need to reschedule.
On the day before your telemedicine appointment
Have your insurance information ready. If you usually have to pay at the doctor’s office, have a credit card ready for your co-pay. You must complete eCheck-in and pay the co-pay to be able to have your telemedicine appointment.
You can complete MyChart eCheck-in up to seven days before your appointment.
MyChart eCheck-In
You will need to follow these steps before every telemedicine appointment.
Step 1
If you have downloaded the MyChart app before, open it. If you have not, download the MyChart app from the Google Play store by going to the Google Play store and searching for MyChart or by clicking here from your phone.

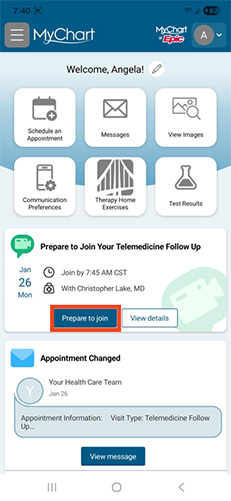
Step 2
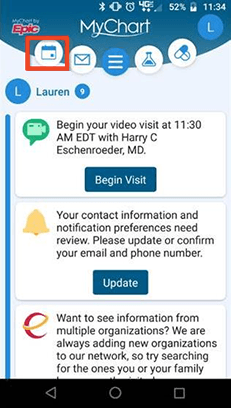
Once the MyChart Mobile app is open, log in. After you log in, click on the Prepare to Join on the upcoming video visit.
Step 3
You must fully complete eCheck-in and pay the copay to be able to join your telemedicine appointment.
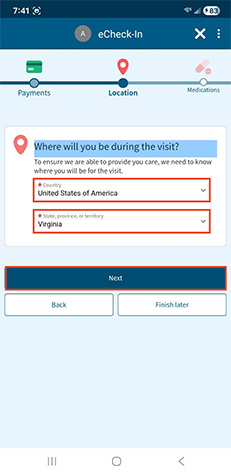
Step 4
During the eCheck-In process, there is a location question. This question will determine if the visit may take place as scheduled.
Step 5
After you have completed eCheck-In you may close the MyChart app until it’s almost time for your telemedicine appointment.
On the day of your telemedicine appointment
Before joining the call, remove dressings and bandages and sit in a well-lit area.
TIP: If video calls and watching online video works better some places in your home than in others, sit in one of those places.
You can follow these steps up to 20 minutes before and 15 minutes after your scheduled appointment.
If you would like to add another person to your telemedicine appointment, such as a family member, skip down to those instructions and then rejoin the instructions here at Step 3.
Step 1
Open the MyChart Mobile app and log in.
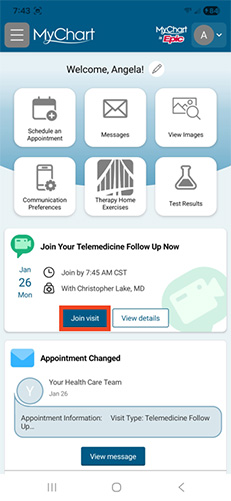
Step 2
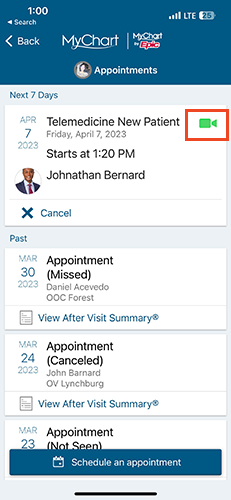
If you’ve successfully completed eCheck-in and it is near the time of your appointment, you will see a Join Visit button for the upcoming visit from your main MyChart Mobile app screen. Click Join Visit.
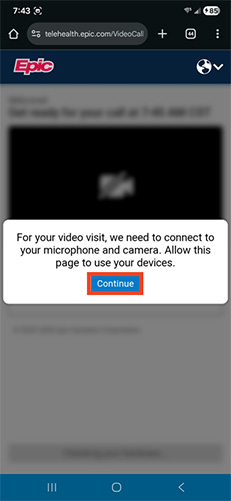
Step 3
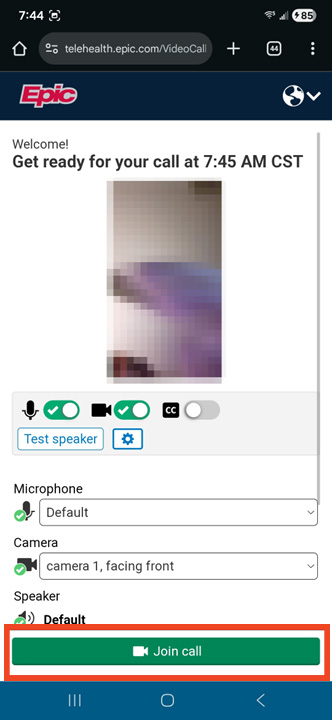
Once you click Join video visit, MyChart will ask for Access to your microphone and camera then launch a Hardware Test where you ensure your camera, microphone, and speaker are working. Click Continue.
Step 4
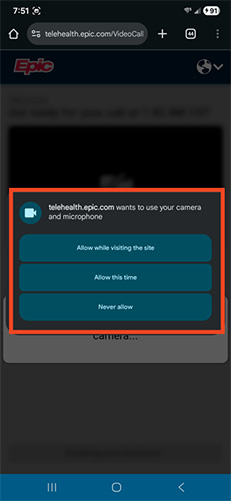
When your phone asks if telehealth.epic.com can access microphone and camera, select either “Allow while visiting the site” or “Allow this time”.
Step 5
Once you have received green checks by your camera, microphone, and speaker icons the “Join Call” button will illuminate. Click the Join Call button.
Step 6
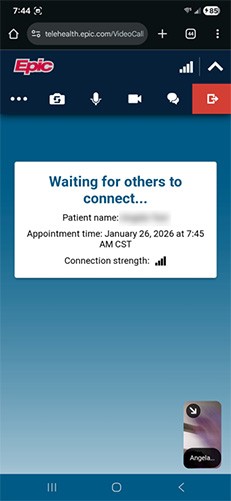
After you click Join Call, you will be placed in a virtual waiting room.
Step 7
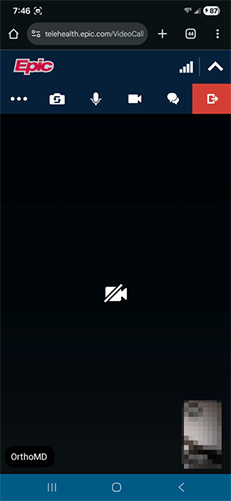
You will have your telehealth visit with your clinician.
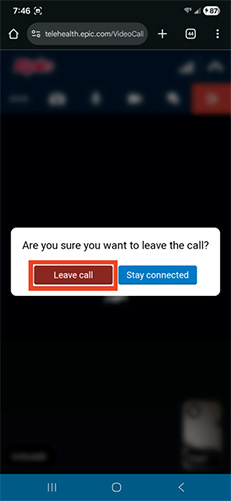
Step 8
Your clinician will leave the meeting when the appointment is over. Click Leave Call to leave the call.
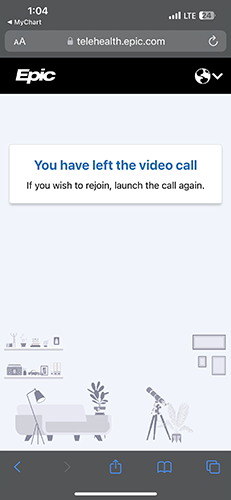
Step 9
The call will be disconnected.
Add another person to your telemedicine video visit
If you would like to add another person to your telemedicine video visit, such as a family member, follow these instructions on the day of your telemedicine visit.
Step 1
Open the MyChart Mobile app and log in. After you log in, click on the Visits button.
Step 2
If you’ve successfully completed eCheck-in and it is near the time of your appointment, you will see a green camera on a button for your appointment. Click on this button.
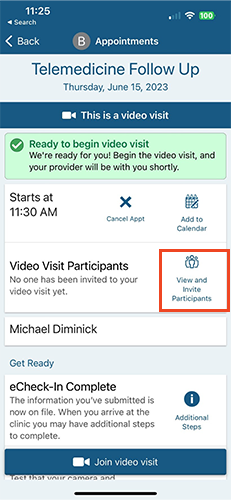
Step 3
Click “View and Invite Participants”.
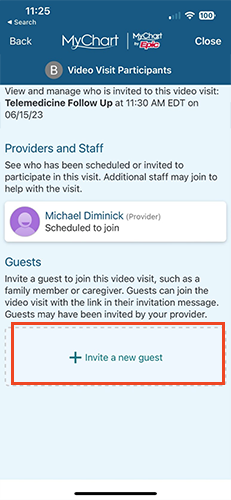
Step 4
You will see who has already been invited. Select “Invite a new guest” to add someone additional.
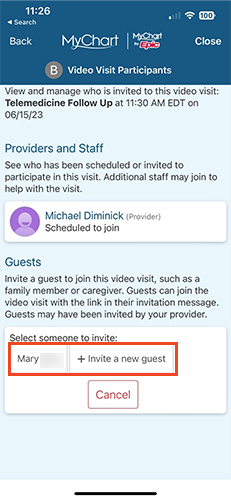
Step 5
A list of patient contacts will show so you can select one, or you can invite a new guest.
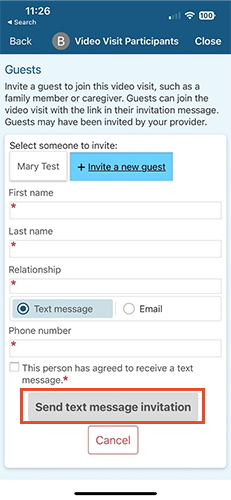
Step 6
Click “Invite a new guest” and fill out their information. Once all sections have been completed, the “Send text message invitation” button turns green. Click it to send the invitation to the guest via text.
Step 7
You can then see the information you provided, edit it, or add another guest.
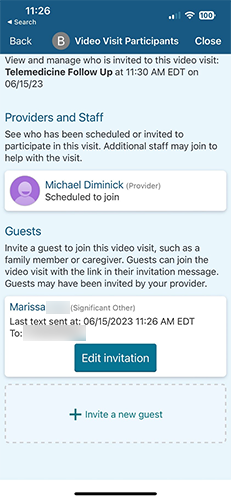
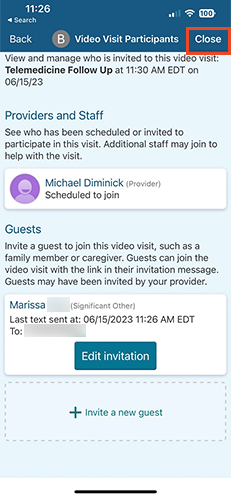
Step 8
Click “Close” to close the guest portion.
Rest of steps
Follow the steps for “On the day of your telemedicine appointment” above, starting at Step 3.